zoom
 zoom
zoom

| One to eighty seven (4) |
|
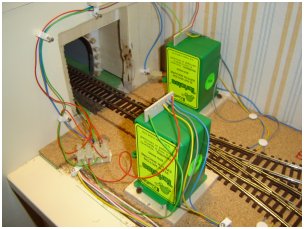
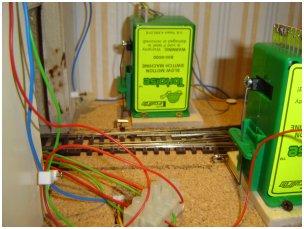
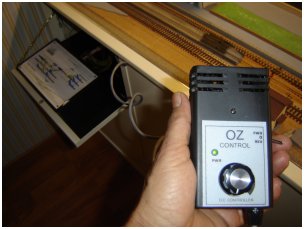
A few words about the motorisation of the three point exchange at the entry to the hidden station and positioned at the beginning of the tunnel. When the model was planned for the invisible part I did not think that I would ever have had to work underneath the level of the track which is completely unreachable! I had intended to leave all the connections and the motors for the points on the surface. The easiest option would have been to use two Roco motors externally but, to complicate matters for myself and to respect the homogeneity of the motorisation I decided to use the Tortoise motors. Instead of mounting them underneath the board however, I discovered a fairly original solution to get them to work from above! The enlargement of the photo explains how it was done better than any written explanation. I do not as yet know if this will be reliable or not but an eventual substitution with another less complicated system would be easy and quick to do. |
|
2007 January
zoom
zoom
|
|
Doing this type of work it is only normal to do a bit here and do a bit there in the long travail towards journey's end. Given the amount and diversities of the various jobs to be done it is normal as far as I am concerned, to leave some things uncompleted also because after a period spent on one job I find myself getting tired and feel the need of doing something different.
|
2007 February
zoom
zoom

zoom
zoom
|
|
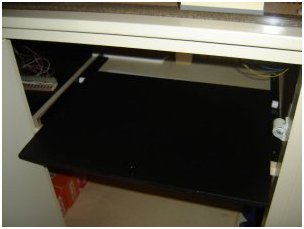
After having finished all the electrical connections to the synoptic panel (sectioning, uncoupling mechanism e points) and whilst waiting to build the second control panel (type of current, traffic lights and automatic systems) which will be sited to the left of the existing panel, I finished the analogic electrical system. The left hand side of the sliding panel now contains a small, cheap transformer which has been adjusted to an exiting charge of 9 volts of continuous current which is used for the points system and an old Trix transformer which has been adjusted to 8 volts and which is used for the OZ Control. This small black box with which I control the direction and speed of the trains is no more than an inverter with a rheostat which was available some fifteen years ago. It has two notable advantages over a conventional transformer and to whit:
|
2007 March
zoom
zoom
|
|
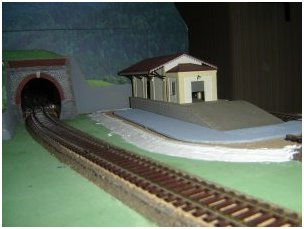
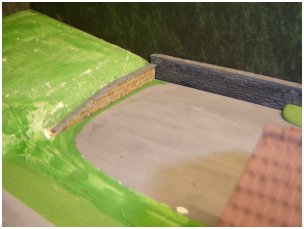
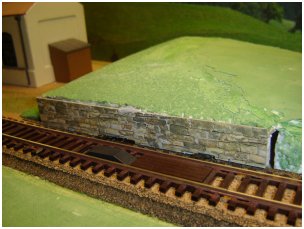
I begin work on the details pertaining to the morphology of the terrain and the functional to the type of route. For the entrance to the tunnel I found a product which I quite liked. The Busch-Mauer Platte n° 7402 was however, too new-looking, perfect and uniform and so I had to make it as used and lived as possible. The ageing process consists of three distinct stages. With very diluted water-based paint on a base of red brick I first gave a coat of black, then, before this had dried, a coat of light grey and again whilst still wet, a coat of clear water. Given that there are still important finishing details to conclude, I think that the result is not too bad. The portal was painted and aged by my friend Enrico, who as can be seen from the photographs, is much neater and more accurate than I am. |
2007 March

zoom
zoom
|
|
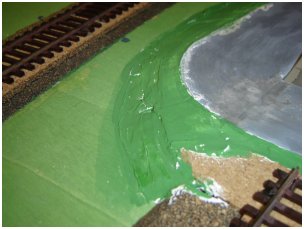
After having fixed all that which will never be moved again, I continued to smooth the landscape with one or more layers of plaster over those steps formed by the placing of objects diverse in height, trying to render the slopes as natural as possible. As soon as the plaster is dry I paint it green to have an idea of the chromatic balance and the various divisions of colour. The choice and the painting of the asphalt was much more difficult than I had at first thought. A narrow country lane and the asphalt of a shunting yard cannot be the same. First I coloured it grey then I applied the stains. I will however, have to go back to it to render it more realistic. |
2007 March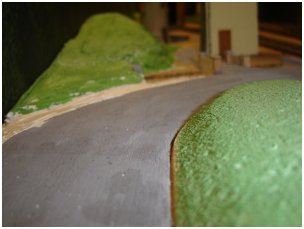
zoom
zoom
|
|
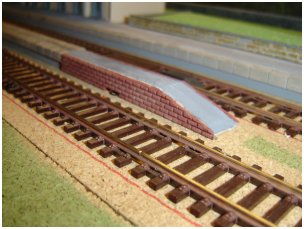
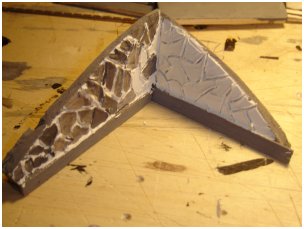
During the construction of a model railway it is very difficult not to build small, medium or large walls. The realisation of this particular, unless one is fortunate enough to have a labouring gang in 1:87 scale, can be effected in various ways and with differing degrees of difficulty. For simple low walls as in my case, one can choose between single painted wood strips to strips covered by specific paper or card easily found in modelling shops. On the top of the walls to finish the construction, one can add another small strip as a natural conclusion of the whole. Being convinced as I am that all this forms part of a time-filling hobby, it is important to dedicate as much time as possible to jobs that are fairly complicated to both fill up as much time as is possible and at the same time obtain the maximum realism possible. Choosing therefore, the most complicated way, I thought it only just to characterise these wall details by finishing the upper level with a course of small slabs one next to the other. For the record, with the exception of the material used for the tunnel, I used the following products: Heki 70052, Faller 552/6a and Vollmer 6043 all coloured with water-based paints. Also in this case, I will obviously have to return the job to realise all those details and touches to produce the ageing process in a countryside ambience. |
2007 April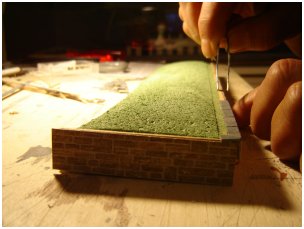

zoom
zoom
zoom
zoom
|
|
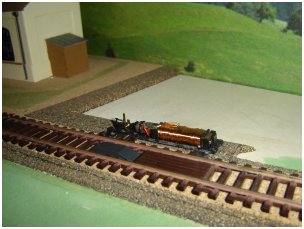
Some problems I could have avoided. I refer to the uncoupling mechanisms to which I dedicated a lot of time during the planning so that with the mechanisms in a logical position, they could function efficiently. Until such time as digital, rather than analogic mechanisms are available, mechanisms which will allow us to uncouple wagons when and where we please at low cost, the positioning of this apparatus is absolutely crucial. Unfortunately, who knows why or how, I did not buy the mechanisms with the motors positioned underneath, and so I had to find a way not to hide them but to disguise them as best I could. Taking into consideration the fact that whether they have motors underneath them or not, uncoupling mechanisms are decidedly ugly. After having removed the motor covers to gain at least 1mm, the adopted measures were as follows:
|
2007 April
zoom
zoom
zoom
zoom
|
|
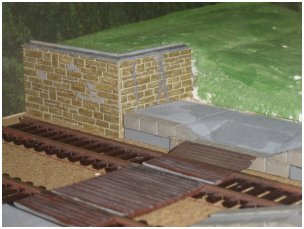
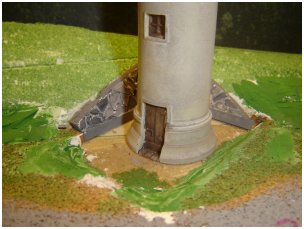
In the creation of the containing wall of the water tower I experimented with a technique for the making up of stone walls which I think to be fairly satisfactory. I applied a thin layer of plaster to the surface. Then, before it was dry, I drew the shape of the stones with a small stylus. The stones were then coloured in an appropriate shade. Lastly in the white spaces between the stones I ran a different shade of grey for the grouting. |
zoom
zoom
|
|
< < < < <
Previous
Onetoeightyseven
Next
> > > > >
|