

| One to eighty seven (01) |
|
Initially, I had the idea of partially covering a wall with some display cabinets so that some long forgotten artefacts hiding in the attic could shine with their former splendour. The first showcase, sufficiently long to display at least four carriages of the six or seven trains I made up for the large almost finished model which was and is still living up in the attic, was positioned at the end of September 2005. |
|
2005 November
|
|
I walked back a couple of metres and observing, I thought that some small diorama could be placed so that my old love could be represented in some respects better than a mere exhibition of model trains. It was only when I had a piece of wood of about 1.50m. X 0.30m. that I realised how much could be done in such a small area. But why stop at such a small diorama? In an instant my imagination had covered the whole length of the wall and in only 40cm. of width, I envisaged a whole world! The only way of arriving at my objective was to go through lengthy and gruelling negotiations with my wife, Caterina. I had only two possibilities of which (A) was certainly the more uniform, regular and of visual effect. Considering however, the wish of creating a final product which was not too dependent on a very long piece of furniture, I opted for plan (B) which, even if offered less space and irregular at that, permits of a more well-balanced placing of the piece. |


|
|
The authorization I received was not especially great, but upon reflection, it was exactly that which I had wanted. I was conceded a wall 430cm long and having a maximum usable width of 36cm. The space was perfect for a point to point track with one of the two stations being completely hidden. After having decided to replicate an Italian scene of the 1960's, before planning the layout and type of track, I had to examine the available backgrounds, finally opting for Vollmer's 6109 280cm.x 80cm depicting a mountainous/hilly area not too removed from that to be found in northern Tuscany. At this point I knew that the visible area would have been 280 x 36cm and in the remaining 150 x 20 cm I would have to create the area of the hidden station. The cabinet, fruit of the preceding calculations, was placed at the beginning of January 2006. |
2006 February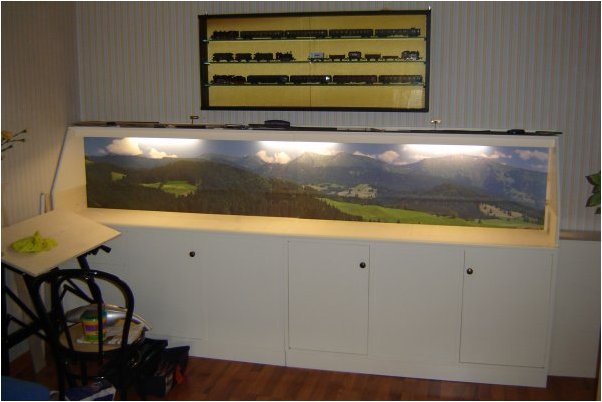
zoom |
|
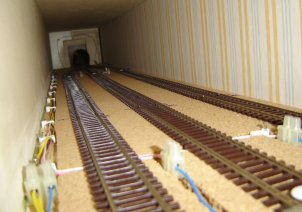
Because of the length of the piece and its awkwardness it was made up of two parts each 140cm. long. The lower parts are not mirrored also because at the far left a drop shelf has been envisaged for future controls. The base board is 15mm plyboard and when all is closed, I have a interior working height of 15cm. This seemed to me to be the only available solution to defend the model from the attentions of my lively three year old grand-daughter who often passes through the room considering it wholly hers. The fantasy secondary line which will be displayed links the principal station of Santa Caterina (two tracks only) with the hidden station of Monte Scuro [Dark Mountain translator's note] which is made up of three tracks served by three-track points. |
2006 March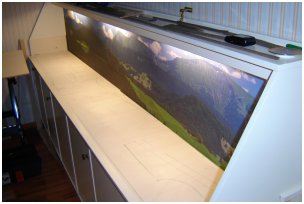
|

|
|
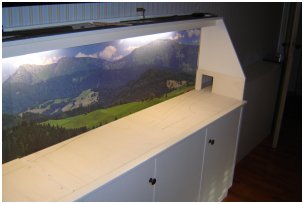
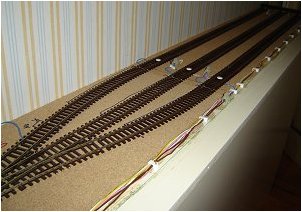
Previous experience corroborated by friend Enrico Turelli's advice, caused me to choose the Roco Line track. The track without roadbed, apart from its excellent construction, allows the laying of points having 345mm of length having a deviating angle of only 10°. It requires a lot of space, but one can achieve a realism which would be completely unthinkable with greater deviating angles. The tracks are laid on 5mm cork, while where embankments are visible, Faller's product no. 765 (flexible strips of cork complete with embankment having a 45° gradient successively reduced to 39° during the laying down of the gravel) has been used. The projected track is very simple and almost totally rectilinear with the exception of the short entry curve to the hidden station which is made up of two R20 elements having a radius of some 196.2cm. |
2006 April
zoom  zoom
zoom
|
|
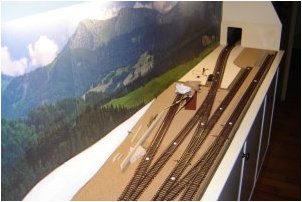
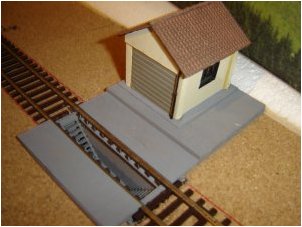
The simple morphology of the terrain composed as is logical and respecting of the background of some few moderate undulations, is made from closed-cell expanded polystyrene, easily workable and finishable with filler. As far as the buildings are concerned I have decided to use those already in my possession for over forty years. This has not been easy because apart from Rivarossi's marvellous goods warehouse, all the others have had to be extensively modified to bring them to the 1:87 scale. The station of Cecina has been increased in height by some 18mm while the locomotive shed (of German origin but I don't remember the company) has been Italianised as much as possible. The small building and the inspection pit have been completely created from scratch. Nothing is perfect but I have done my best. To be exact (except that I don't know how) there remains to find a solution for the entrance doors to the station. They are not to scale, or rather, they do not replicate the dimensions to which that type of door was originally built. |
2006 July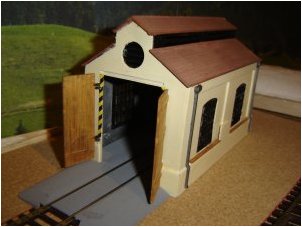


|
|
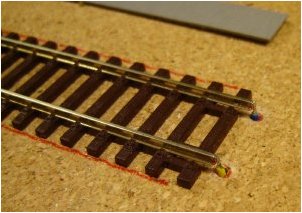
Certainly, thinking back to my earlier creations, I now realise that this time something different is being born. Different both in the structure but particularly in the details, some of which for me, up till a short time ago, were completely unthinkable because I was simply not capable. The platform is made from three different pieces of balsa. The inner part is a single piece of 10mm while the part nearest the tracks is subdivided into two: the lower piece is 4mm x 5mm and on the overhanging outer side in 5mm stone. Unfortunately I did not use a underground uncoupler and therefore have had to build a case of 8mm to contain it. In this instance the distance between the platform and the track will therefore be somewhat less than 1mm than the regular dimension. When I had the idea of inserting an inside edge rail to the level crossing I realised that to be able to respect the distances the profile should be positioned exactly above the inside bolts of the sleeper. This meant that the profile of the track used as the inside edge rail was higher than the track running parallel to it. To cut the track lengthways I had to seek the services of fine engineering workshop. Luckily I was able to use the offices of a good friend who owned such a business. |
2006 September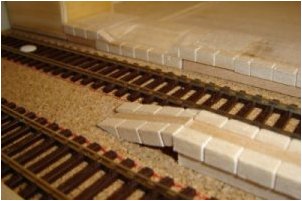
zoom
zoom
|


zoom
zoom
|
|
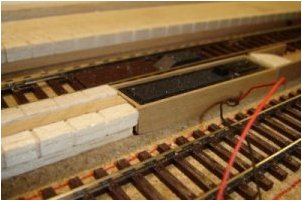
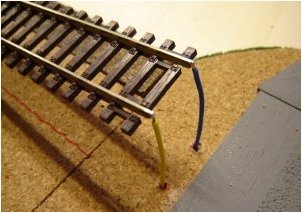
Before fixing the tracks all electrical connections had to be effected. Having decided that eventually everything will be digital, it was necessary to proceed as for any classical analogic realisation. Finding the correct type of wire and if possible as near as possible to the sample found (for example) for the uncoupling gear, in a small town like mine is far from easy. Standard electrical supply shops furnish wires starting from a 1mm section while that which I was looking for was 0.22mm. After having wandered far and wide I entered a small yet well equipped electrical supplier. I was not successful in finding exactly that which I needed but I was able to buy 15m. of braided wire composed of 12 wires of differing colours having a section of 0.33mm a minimal difference from my original objective (see the main mammut wiring diagram in a Word document) The colours used for the different applications are as follows: yellow/blue for electrical current and red, back and green for the points. For the sectioning I preferred to use different colours for in function of their position on the tracks. There being effectively three tracks both in the main station as in the hidden one, I used white for the 1st., pink for the 2nd.,and brown for the 3rd.; thus realising four sections for each track as can be seen in the following diagram: |

|
|
The Roco Line tracks are made of alpaca but the end links are in steel. It was therefore impossible to solder in the classic manner which, compulsorily, must be done on the least visible side. For the sectioning and the electrical current the contacts have been soldered to the end of the piece of track which will be, after the successive covering of gravel, be completely invisible. Contrarily, all electrical connections of the hidden station have been left perfectly visible. |


|
|
Before continuing with the electrical wiring, in consideration of the fact that the finished line will not permit long term running of the new locomotives without stops, with the use of Roco Line tracks (the ones with a road-bed no longer on sale) I created a small oval for the necessary testing and running in. When not in use, as can be seen in the photographs, ir remains hanging as a panel above the part of the cabinet housing the hidden station. |
2006 November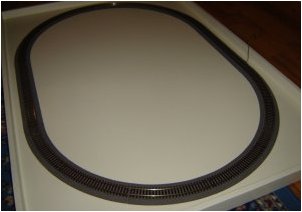
|
|
< < < < <
Previous
Onetoeightyseven
Next
> > > > >
|